CNYBrew.com: March 2007

Saturday, March 31, 2007

Dream of Californication
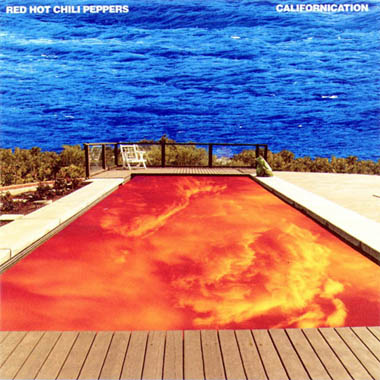
I decided my next brew should be a California Common. This is what I call Californication:

Pale Malt- 2 row US 10.3 lbs
Crystal Malt - 40L 1.5lbs

.5oz Northern Brewer- 60min
.75oz Centennial - 30min
.5oz Norther Brewer 10min

1/2 tbs Irish Moss

Wyeast California Larger

OG- 1.050
FG- 1.010

**Racked it 6 days after I brewed it

I just brewed this today so here are a few things to take note of on this brew:

-I did a yeast starter for this one, though there is some discussion on weather or not a starter is needed with Wyeast and a brew under 1.065, but I still did it. I used my wine bottle with about 2 1/2 cups of water and about 3/4 cup of extra light DME and boiled it for 15-20 min (this was done at about 9pm night before brew day). It started to bubble by the morning and it continued to bubble until I pitched it.

-Over headed Mash water to about 170ish, I added ice and let it sit with the lid open on my mash tub until it got down to 158f. Once at 158f I let the mash go for an hour.

-I went by the 1.5 qts water for every lb of grain giving me a mash water of 4.5 gallons. I may want to cut that back to 1.25qts/lb or even 1 qt/lb next time because I did not use all of my sparge water (input welcomed on this point)

-Fly sparged this batch fully successfully. I used 5.75 gallons for the sparge, but wound up dumping out about 1 gallon or so.

-My last gravity reading was 1.046 and I was shooting for 1.050 so I let it go on a rolling boil for about 15-20 min before adding the 60 min hops. Before I pitched the yeast it was at 1.050 so I was on the nose for that!

I couldn't be happier with the way today's brew session went. I am about 1/2 dozen (maybe 1/2 a bakers dozen, but who is counting) brews into all-grain brewing and I finally have a really good handle on whats going on. This took me about 5 1/2 hrs from start to finish so I am even doing it in pretty good time as well.

I am going to bottle 3 or 4 of these and enter it into a contest. I figure since I am hitting my targets on my brews now I am ready to get some feedback. Either way, it's nice to know the investment in time to come up with some methods that allow me to make the recipes I am trying for has paid off.

Cheers!

Saturday, March 24, 2007

Bottled Mother's ESB

Today was my day to bottle the ESB and take the final gravity. Now I say bottle because I picked up some growlers from my Brother-in-law at his eBay store:

http://cgi.ebay.com/ws/eBayISAPI.dll?ViewItem&item=220065864894

I wound up getting 18 of them because I wanted to start having some brew to take with me places. These worked out well with this batch because I didn't wind up with the 5 gallons I was shooting for. This was the result of all the hops I used in the process and the lack of any filtration out of my brew kettle. I lost a whole gallon's worth of ESB from all of the hops I had to dump out. Oh well, live and learn.

Anyway, I took my FG and it was 1.010 making this a 6.5% ABV wonder. I drank the gravity sample and I was a little turned off because there was a strong alcohol burn, but otherwise it was quite good.

I am hoping that a little bit of time will cure the issues with the burn. I will be sure to write on the growlers, but so far they are great and it's not easy to find the amber ones, so that's a bonus.

Cheers!

Tuesday, March 20, 2007

Quick Tech Note

This one is for the other bloggers and tech folks out there. I have set up an email for the new domain that I have, this email is travis@cnybrew.com so anyone who is so inclined is welcome to email me.

I used the new Windows Live Custom Domain that is part of the Windows Live set of features. I think it's in beta, but it's looking like a very useful service. Tech Crunch did a good write up of the service and I have to agree.

The way that it works is you set up a MX record with your domain host and delete any of the other MX records on the account. You then create a TXT record and the changes only take a few minutes to take effect. From there you hit refresh on the Windows Live dashboard in the setup pane and you are off.

It sets you up with a free 1 gig hotmail account that is @yourdomain.com and you are done.

There are some drawbacks to the system as it currently works. For example, you have to log out of the account you manage the domains with and log into the email account you just created. So for someone like myself who have a couple of websites I am managing, I have to log out and log in every time I want to check a new email. Also there is no way to create a "catch all" for your domain which is a problem.

Big advantage though, it's free! That means more money for beer supplies!

Sorry for geeking it up. Cheers!

Saturday, March 17, 2007

Thermometer Installation

In my continuing quest to find a financial shortcut to everything, this week I installed a thermometer on my brew kettle. I searched around and found that there are 2 or 3 companies that make these specifically for brewing and to install onto a brew kettle. Let me start by saying that these thermometers have a distinct advantage over the one that I installed here because they are marked with the proper temps for everything you would do with homebrewing.


However, I found this thermometer on eBay for $16 (with shipping and everything it was $25) so I was sold. It did not come with the "all-in-one" installation, but I am always one for a challenge. So this is what I did:


Thermometer $25
Brass Fitting $3.95
2 3/4" brass washers $4
2 1/2" rubber gaskets (had them from before)
Thread stuff (had it from before)
Total $32.95 compared to the $33 for an all in one kit...who's the sucker now!

Anyway, I digress, in order to install this I had to use the step drill bit that I used for the ball valve and make a hole big enough that the 1/2" threaded section of the thermometer would fit in. This was as much of a project as it was the first time and as with before, it was as much of a chore as the whole project combined.


As with the ball valve, I put a washer on this with a rubber gasket on the inside so that it would seal the whole upon tightening. I used the thread stuff (in the background) the make sure that there were not any leaking on the connections.


As you will note from the image on the right, I had to put the thermometer offset to the right of the ball lock because the face of the thermometer was not going to fit flush right above the ball lock. If I had elected not to use the washer, it would have fit, but the washer would have been on the lowest ring and would have not sit flush, so tightening would have been a problem. Initially I was a little distraught, but then I remembered that this was MY brew kettle and as long as I didn't care, it was perfect.


Finally I tested it for leaks overnight and it was a slam dunk! I even got the dial on straight (after a few tries) so it's a totally functional brew kettle.


I am going to right a review of the thermometer on the first time I use it because it was reading some wacky temps when it was first installed, but once it got settled, it was fine...we will see.

Cheers!

Thursday, March 15, 2007

Quick update on the Mother's ESB

I racked yesterday which seemed a little soon, but the bubbling had stopped a day or so before. When it was going, it was aggressive. I took a gravity reading and it was at 1.012 (from 1.060) so I have to say it's right on the money.

One thing I have to say though is my overzealous use of hops cost me some quantity. The hops at the bottom of the bucket was so thick, I couldn't save a bunch of the brew so I lost a little bit. I will have to adjust my recipe appropriately for the next time I dry hop or get really aggressive hopping sessions.

Otherwise I cannot wait on this brew. It smells great and has a nice dark hue that should lighten up to a rich deep copper once it's in my glass. With about 6 1/2% ABV at racking, it should provide some intoxication upon consumption as well.

I got my brew kettle thermometer and I took some pics of the installation so I will be sure to have a post on that in the near future.

Cheers!

Saturday, March 10, 2007

Good day to brew

These are just some notes from my brew day today. One quick thing, I appreciate the comments from Bad Ben with recommendations on the ESP recipe, however I did not follow them. Not because I am an ingrate know it all, but because I brewed before I checked my blog (NEVER AGAIN!!!). I think it will turn out okay in the end though.

  • I used 1.5 qts per pound in the initial mash, making the mash a little over 5 gallons of water. I brought this up to close to 170f and when it was added to the grains, it kept at the 154f I was shooting for.

  • I had my sparge water all ready to go and in the process of lifting it onto my rack, it plug came out and since I was not in the mood to dip my hand it 180f water, I let it drain out. I ended up having to get another 4 gallons or so up to temp for the sparge and I did a batch sparge instead of a fly.

  • I tested the gravity after the first mash and half way through the batch sparge. The mash reading was 1.065 and the last reading was 1.056ish. It ended up boiling down to the 1.060 I was shooting for.
This is a picture of my new brew kettle in action! The rings are a great guide on the amount of liquid you have in the kettle and proved to be pretty accurate. After the boiling and cooling, there wort was up to the middle of the lower ring and I ended up with a little over 5gallons.


This is a picture of the ball valve, no leaks! This is proof that you can do it your self without the weld less conversions. However, after looking at the cost comparison, its a toss up.


Finally, I would normally hook my wort chiller to t normal hose fixture in the basemen (I unhook the washer). However, since my wife was doing laundry, I came up with this solution. Duck tape, the solution to all of life's problems. Reminds me of a quote;

"If it slips, duct tape it, if it's stuck, WD40 it"


Cheers!

Thursday, March 08, 2007

Mother's ESB

This is the beer I am going to brew this weekend. I got the inspiration after reading the blogs of some folks that have left comments, (Bad Ben and Ted I am looking in your direction) I couldn't help myself but to jump on the ESB Express. I was initially going to brew my Belgium Wit, but it has been colder than a bastard in Upstate New York and I like my BW in the sun, so I decided to wait.

So using my handy dandy Designing Great Beers book, I decided to go ahead a design an ESB I will name this weekend. Here goes:

*This recipe was based on 65% efficiency so adjust accordingly

12.69 lbs (5756g) 2 row pale malt
1.05 lbs (476g) Crystal Malt 60L
.45lbs (204g) Chocolate Malt

Boil-2.5oz (70.9g) Goldings 5% AA
Flavor-1.2oz (34g) Fuggle 4.75%AA
Aroma- 2.2oz (62.4g) Mt. Hood 5.5% AA
Dry- 1.5 oz (42.5g) Goldings 5% AA

Wyeast 1028 or 1968 (gotta see what my brew supply has in stock)

OG- 1.060
FG- 1.012

6.5% ABV
48IBU

So I will probably have some adjustments to this after I go to the brewer, but this is what I have so far. Anything seem out of place?

Monday, March 05, 2007

kegged and tasted the Shlitz


So tonight I moved my Schlitz from the garage to the keg and into my stomach. This is my first Lager and next winter I am going to try and get more into these lagers because they are a nice break from the complex flavors of a lot of the Ales that I make. I let this hoss lager for 2 months (new record for me for allowing time to pass without drinking my beer).

Anyway, one of the most gratifying things about this beer is that the first taste rushed me back to my days at the frat house pounding cheep brews out of funnels. The smell was woven into my senses as the first thing I caught a whiff of in the morning. Feet sticking to the floor, digging my books out of a pile of empty beer cups, the great wall of empty kegs...those were the days.

Now I am sure you are reading this wondering "why the hell would you brew something that reminds you of college beer?" and I too asked myself the same question. To be honest, I am not sure, but it's really rewarding to know I can make decent schwag beer.

So here is the official review:

Aroma: This has a sweet malt smell with a distinct maze nose that was the part of the beer smell that reminds me of Natty Light.

Color: I don't have a SRM chart, but I would say it's in the 20-30 SRM range. Its a light gold color that should be more clear than it is (I forgot the Irish Moss).

Taste: Well it's an American Pilsner, what more can I say? This is a distinct corn/maze flavor with sweet malt overtone. There is little to no hop bitterness that jumps out at you, but there is a dry finish that I think is the hops that was in it.

Mouth feel: Light for this style, but I think my kegerator needs to get it's self back on track!

Drinkability: Well it's an American Pils, at about 5% ABV and very light body there is not much to worry about here.

OVERALL: Meh, it's still better than Bud!

Sunday, March 04, 2007

New Brew Kettle Step 2

So after the initial issues I had with cutting the top of the keg off, things actually came together very well in the end. Here is what I did:

After I drilled the hole in the side that was big enough for the 1/2 brass connector piece to fit through, I used the Teflon tape (yea it's pink, so what?) to seal the threads. *I did not use the connector pictured because the non-threaded area in the middle made this too long. The one I used was the same thing only with out the non-threaded area in the middle.


From here I attached the 1/2in brass ball valve I got at home depot with a 3/4in brass washer and a #14 rubber gasket. On the inside of the keg, I used an old 1/2 to 3/4 in piece I had from a cold plate setup I took apart. I used this because with the washer, it was the only thing I had that was going to make the connection tight enough to keep the water from leaking. I used another 3/4 in brass washer and another #14 rubber gasket as well.

Outside


Inside


After a couple of tries with the sealing and re-tightening, I had it with no leaks so I left water in it over night. I also dealt with the sharp edges left from the cutting process with some coarse sandpaper I had left over. This was wood sand paper, but it really did a job on the keg and its all dull around the sides now.


From here is was just a matter of attaching the 1/2" hose barb adapter.


As you can see, this is a huge upgrade in the size of my brewing operation.


I am waiting on the delivery of a thermometer for the keg that I ordered off of eBay. I will be sure to review the product and the seller as well as the installation.

I am brewing with the new setup next weekend so we will have to see how it's going to go.

Cheers.